 |
| What could possibly go wrong?! |
These aren't instructions, don't follow them. This is simply for my own documentation.
I'm going to be using two common methods; PCB toner transfer and Acidic Copper Chloride etchant. I originally bought Ferric Chloride etchants but this stuff is really nasty as far as disposal.
I found two decent reference articles describing the etching process. This Instructables article was good, but this page is far better.
To set myself up with a home etching rig, I purchased the following.
- 1 gallon 10Mol HCL, $6
- 1 litre Hydrogen Peroxide, $1
- Acetone, $7
- 1 Pyrex tray with lid, $11
- 1 large plastic tub, $15
- Cooking hot plate, $20
- Box of 100 Nitrate disposable gloves, $14
I also purchased a 1000mL erlenmeyer flask, but I ended up not needing this. My original intent was to store the solution in this, but the Pyrex tray ended up working very well for this task.
So spending a total of ~$100 I was able to get setup. ROI will be after two boards, so not expensive at all!
PCB Preparation:
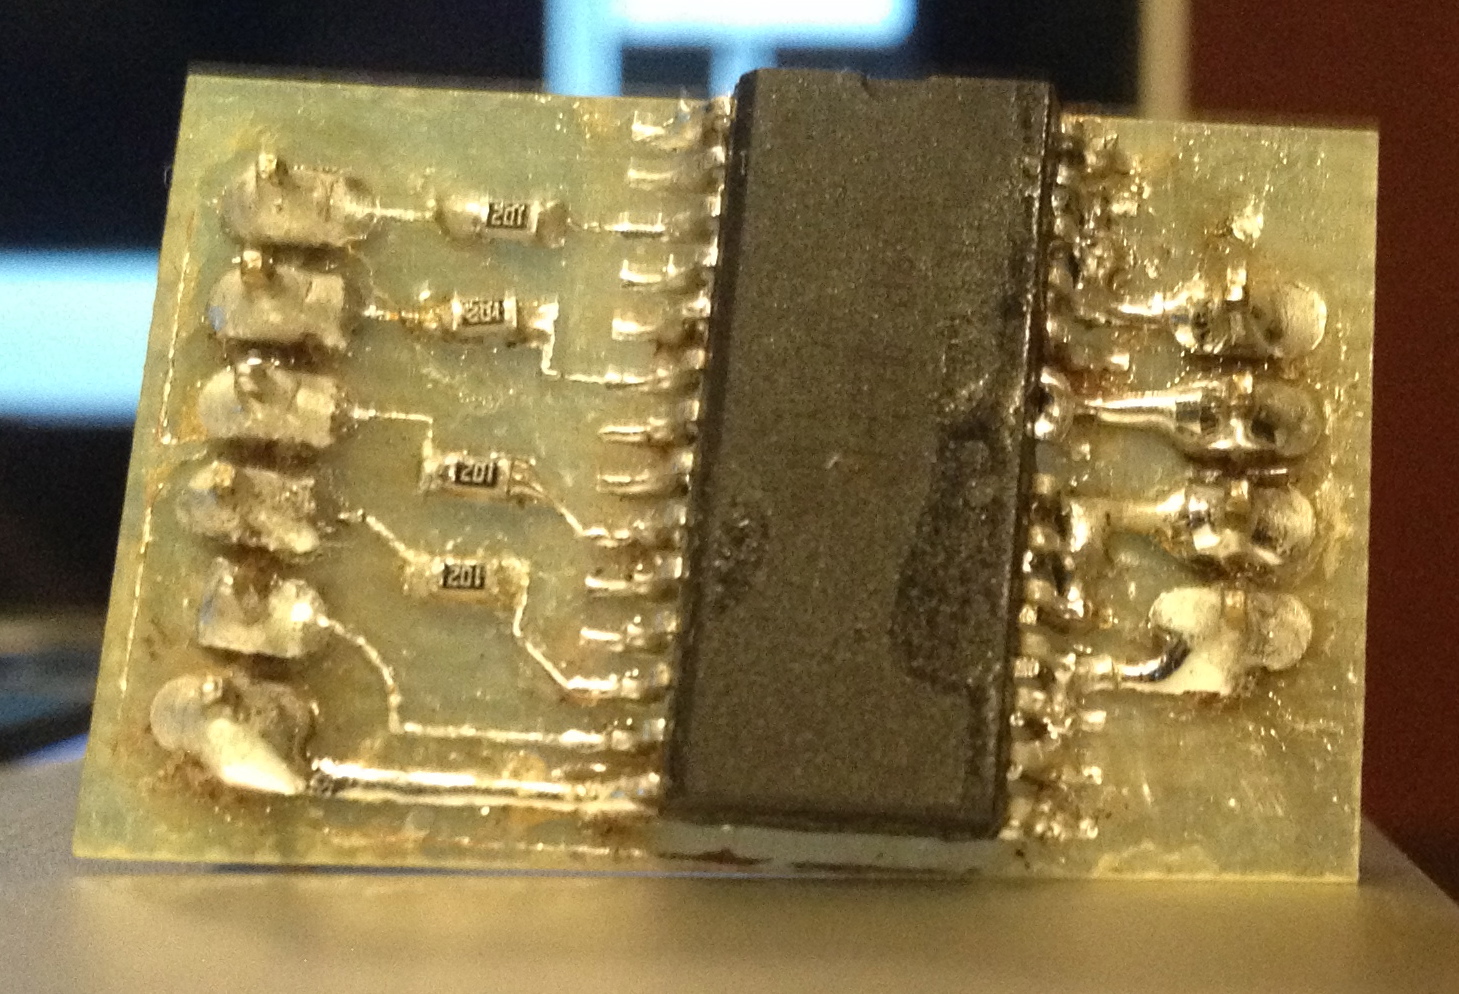
So I'd say this was pretty successful. I think I can make pretty damn small traces.
Points of improvement:
I created a breakout board for a SOC24 I'd like to experiment with. This uses a SOC24 footprint I manually created in Eagle, 0603 resistors, and 8 mil tracks. I wanted this to fit nicely in a breadboard and I almsot got that; Its a little too wide. It should be a pretty fair benchmark!
I printed the layout onto some glossy photo paper. I used a 400F iron to heat transfer this to a copper blank. This process requires a TON of refinement. I needed a way to secure the PCB to the photo paper, so I used tape. The tape obviously doesn't fair well under these conditions. A new way to secure the paper to the board needs to be found.

After transferring the toner and soaking the paper, I was left with this. Tons of paper left over, very disappointing. This required laborious manual cleanup. I might try with different photo paper, and I think I'll pick up a hard bristle brush. I got overzealous my first attempt and removed some etch resist, requiring me to start over! Ugh.

Final resist mask. If you look at the large version of this, you can clearly see some missing resist mask on the right through-holes; This is from my manual cleanup.

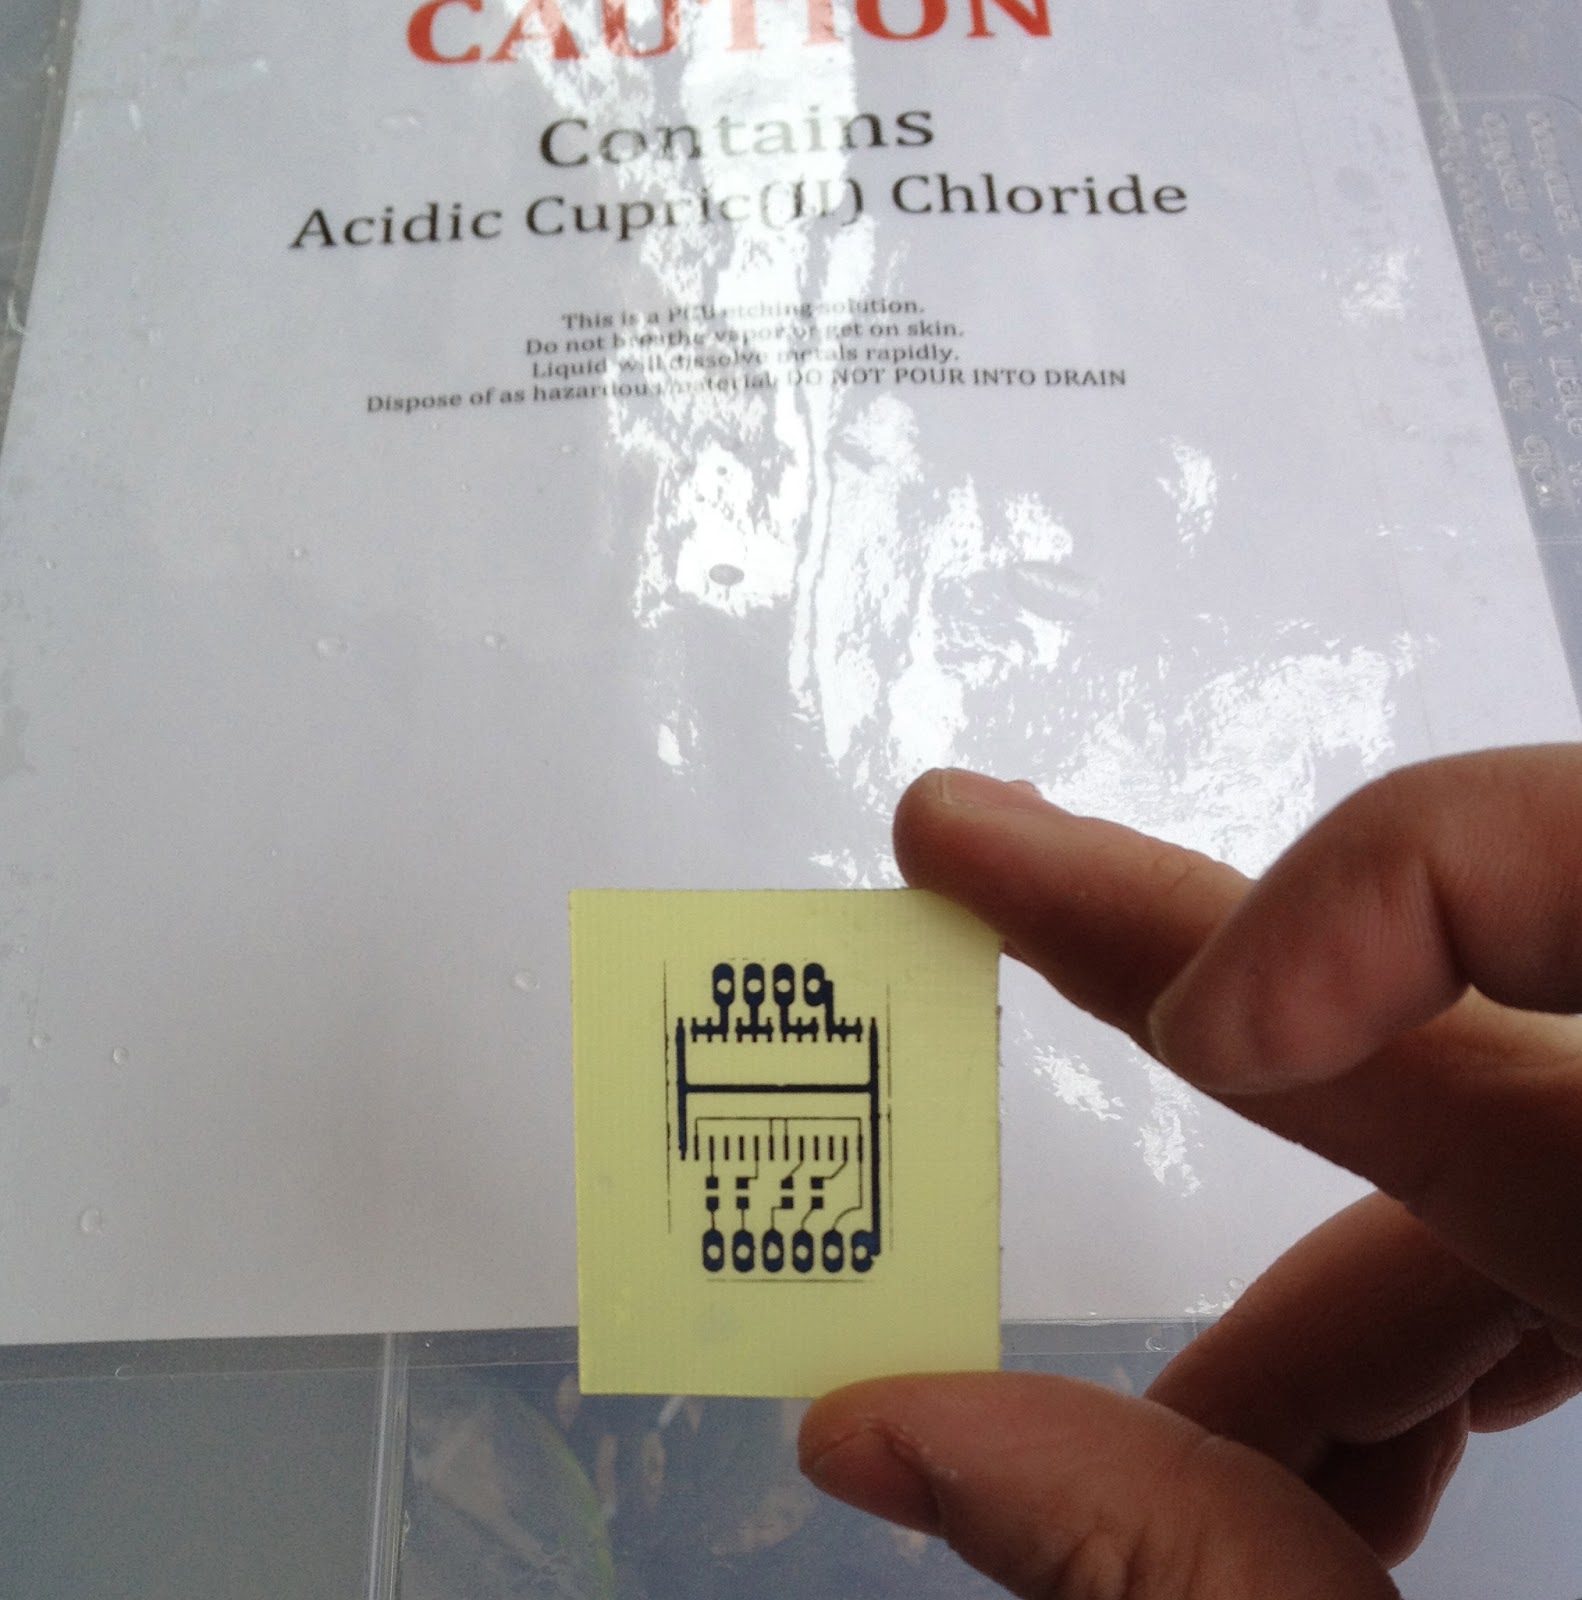
Preparing the etchant:
If there are photos missing of these processes, it is because I had no way to take photos. My iPhone is robust, but not 10 molar acid robust.
All of this occurs outdoors. I started preparation inside the plastic tub to contain spills. First, I added 300mL of H202 followed by 150mL of HCl into my Pyrex tray. I then moved the Pyrex tray out of the container and onto the lid of the container. This reaction will produce (heavier than air) Chlorine gas, and would collect in a container.
At this point, I threw the PCB into the solution. And nothing happened. I checked 1 hour, then 2 hours later and still no visible signs of etching. I decided to leave it overnight.
 Possibly over etched. The only thing left is the floating toner/resist mask! At least I know the resist mask won't dissolve. The problem here is pretty obvious; I live in Minnesota and it is winter. Etching at -5C isn't going to work. At that temperature, its etching in the microns of copper per minute.
One hotplate and another PCB later, we're cooking! I kept the solution at about 40C. It took around 6 minutes to etch.
 |
| Breakout board in eagle. |

After transferring the toner and soaking the paper, I was left with this. Tons of paper left over, very disappointing. This required laborious manual cleanup. I might try with different photo paper, and I think I'll pick up a hard bristle brush. I got overzealous my first attempt and removed some etch resist, requiring me to start over! Ugh.

Final resist mask. If you look at the large version of this, you can clearly see some missing resist mask on the right through-holes; This is from my manual cleanup.

Preparing the etchant:
If there are photos missing of these processes, it is because I had no way to take photos. My iPhone is robust, but not 10 molar acid robust.
All of this occurs outdoors. I started preparation inside the plastic tub to contain spills. First, I added 300mL of H202 followed by 150mL of HCl into my Pyrex tray. I then moved the Pyrex tray out of the container and onto the lid of the container. This reaction will produce (heavier than air) Chlorine gas, and would collect in a container.
At this point, I threw the PCB into the solution. And nothing happened. I checked 1 hour, then 2 hours later and still no visible signs of etching. I decided to leave it overnight.

One hotplate and another PCB later, we're cooking! I kept the solution at about 40C. It took around 6 minutes to etch.
|
| Yay, Chlorine gas! |
 |
| Post etch |
 |
| Mask removed with Acetone |
 |
| Complete! |
So I'd say this was pretty successful. I think I can make pretty damn small traces.
Points of improvement:
- Improve resist transfer process.
- Need to remove paper fibers without scratching away resist mask.
- Better way to fix mask to PCB during transfer
- Oxygen solution regeneration
- H2O2 allows an etch to occur, but decomposes really quickly. Having to add dilute H2O2 each time will water down the solution rapidly.
- A bubbler would be better
- Use a drill press to make through-holes.
- I used a Dremel and it was a mess.
- Improve SMD soldering skills.
- This is the first time I've soldered SMD, and it shows. The circuit functions and there are no bridges (Where there shouldn't be), but the quality is terrible. I had a few pads lift!
- Cleanup of the final board
- I've still got a ton of flux on the board, which makes it sticky and ugly.
Nice!!
ReplyDelete-Odden